My personal insecurity comes out after an evening of wrenching in Killa’s Garage. I wake up at three AM unsure of whether I have properly tightened all the critical bolts on a friend’s bike. I can’t go back to sleep until I have sent my friend a note to check that whatever I worked on is tight.
Most concerning for me are the cable fixing bolts on the derailleurs and brake calipers, especially on the brake calipers.
I worry about this because as I am stringing up a component, I make a preliminary guess on cable tension then snug down the cable clamp bolt just enough to operate the component and check my guess. Then I loosen the bolt a bit, make any adjustment, and do the final tightening. This way I don’t mash the cable in more than one place. It is essential that I remember to perform the final tightening step on each clamp bolt.
In case you were wondering, Shimano’s recommended torque for derailleur and brake fixing bolts is 6-7nm.
So I walk around the bike with 4mm and 5 mm wrenches and talk to each bolt (all of them, not just the cable clamping bolts) one final time before taking the bike down off the rack. “Hello, front derailleur mounting bolt, did I loosen you today? Did I retighten you…?” I don’t think this means I’m crazy, as long as they don’t start talking back.
Pro Tip for Cable installation: Don’t cut any cables until you have everything strung up and working. It is relatively easy to pull and re-thread an uncut cable. A cut cable will likely fray and become a throw-away.
Pro Tip for Front Brake Re-Cabling: If you use a fork mount work stand as I do, you can’t make front brake adjustments with the bike on the work stand because, well, the front wheel is not there. Keep a block of wood (or something else) handy that is a little wider than an average rim. Use this block to make a preliminary adjustment of cable tension with the pinch bolt.
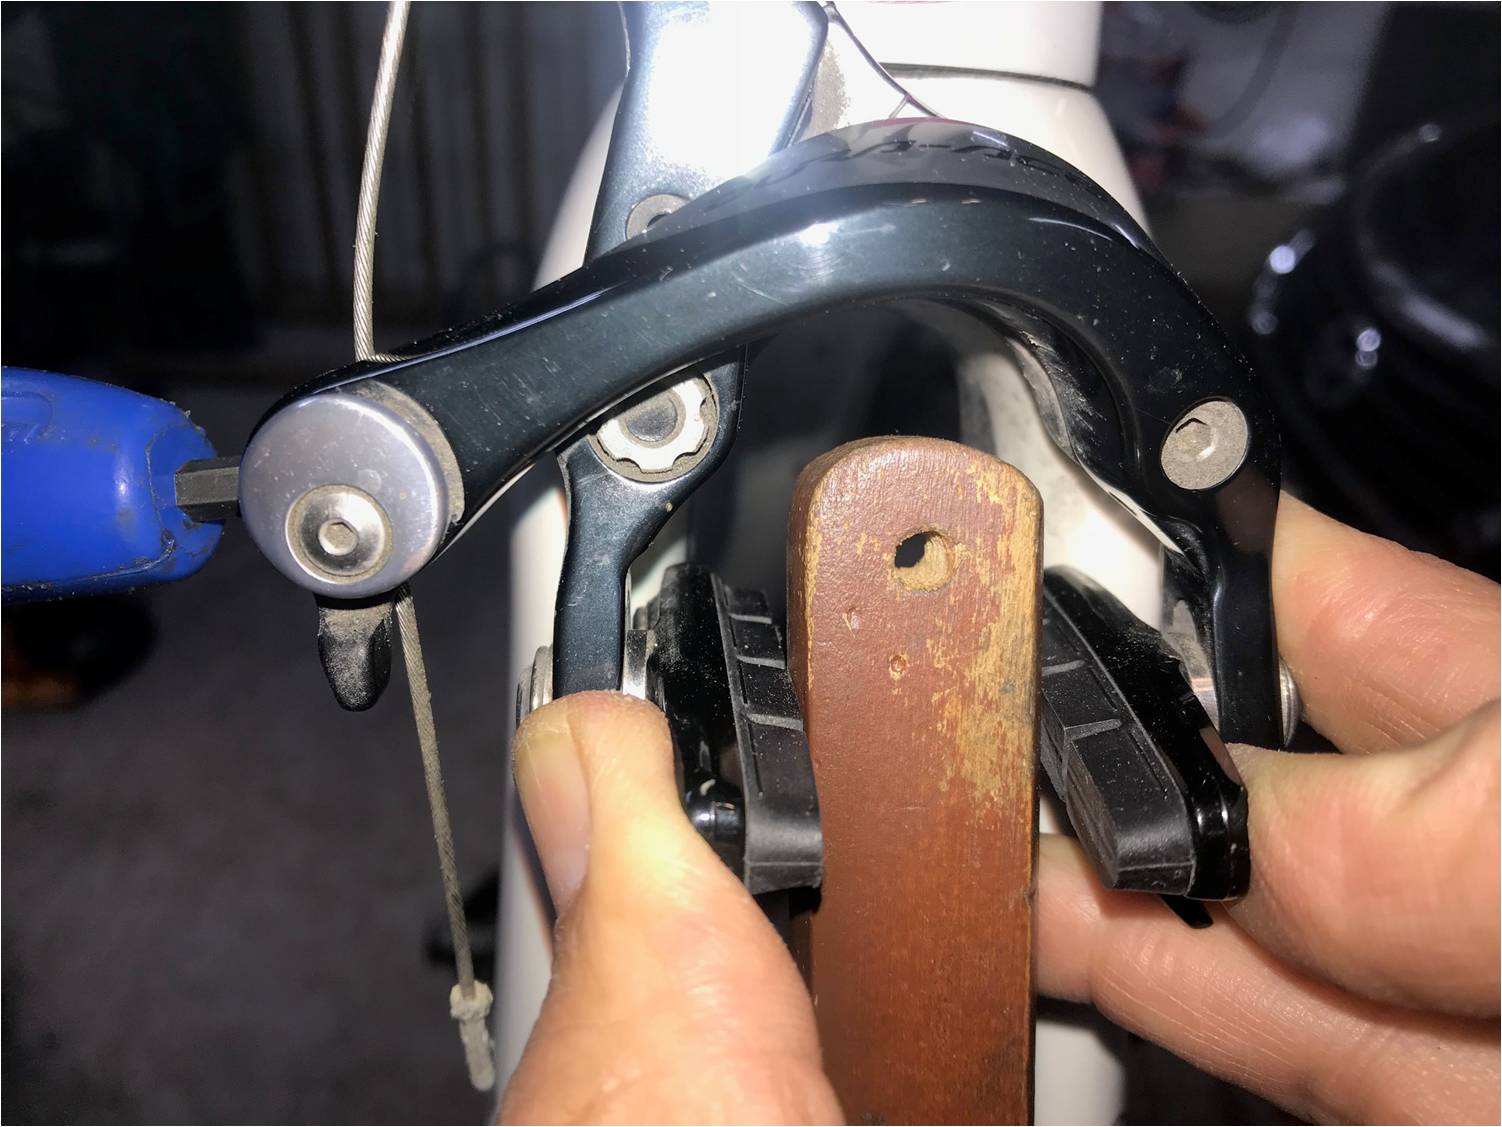
Writing this post has given me two continuous improvement ideas: 1. Attach a small T-bar across the top of my wood block so it will stay in position without brake pad pressure. 2. Attach the block to my workstand with a piece of string so it is always handy.
With a little practice you can get close enough on the first try so that you can make your final adjustment with the adjuster barrel alone. You still will need to center the brake with the wheel in place. But that’s easy if you follow my tutorial on Centering Dual-Pivot Brake Calipers the Right Way.