It’s been a while since I posted. I’ve been working on this compendium of annoying bicycle noises for over a month. The list keeps growing faster than I can write, so I’m gonna publish this “part one” and keep working on the rest.
Don’t you hate it when your bike is making a clicking, or creaking, or ticking, or buzzing noise and you can’t figure out what it is? I do! It’s especially annoying on carbon fiber bikes and wheels because they seem to amplify noises and echo them all over the bike. I’ve heard a lot of noises, and I’ve been able to run most of them down. I’ve also heard about some weird ones from friends who have been able to eliminate them.
One of the keys to finding the noise is the rhythm. Does it repeat in time with your pedal stroke, with wheel rotation, or with bumps in the road? Not that repeating in time with your pedal stroke means it is in the drive train. But it’s a clue. Potential noise sources all over your bike are stressed in time with your pedal stroke, from the handlebars to the quick release skewers.
First, let’s assume that your derailleurs are correctly adjusted and your chain is oiled. Now, in no particular order:
Cracked Frame
I’ve seen two cracked frames that were not the result of crash damage. One, belonging to my friend Pierre was a titanium frame with cracks that propagated from one of the water bottle bolt holes. A creaking noise led to discovery of the cracks. Being an engineer, of course Pierre drilled stress relief holes at the ends of the cracks.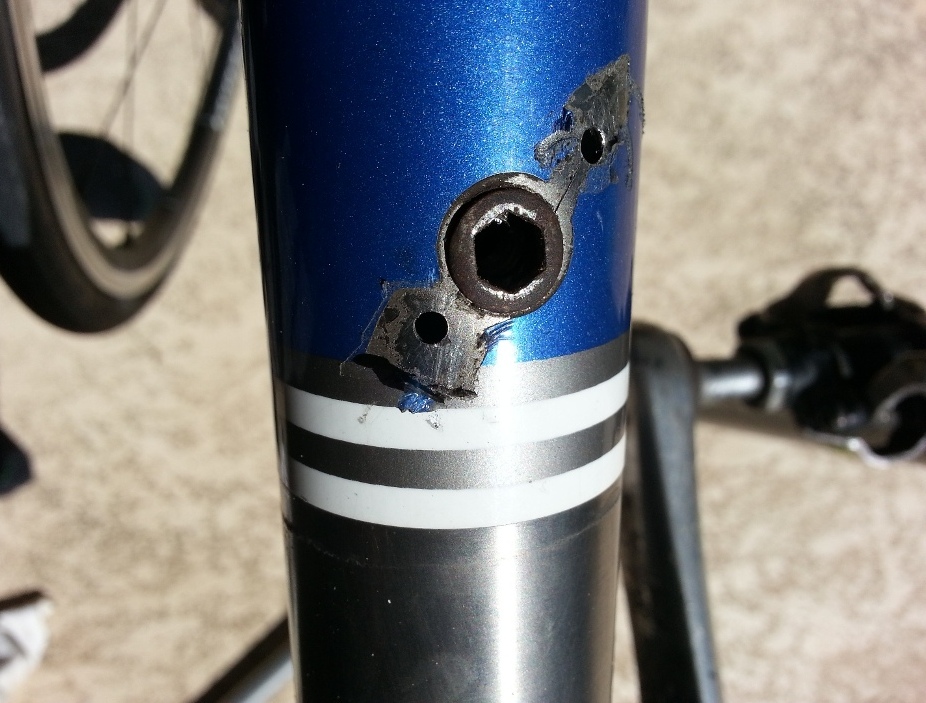
The other was a carbon frame with a crack somewhere down around the bottom bracket. When my friend Ironman stood up to sprint, you could hear the creaking a mile away.
My friend Maverick had a chainstay come unglued from the dropout, but that one was pretty easy to diagnose. The rubber on paint sound, accompanied by a strong braking sensation, was caused by the wheel shifting to the right and rubbing through the chainstay.
Cranks and Crank Arms
Cranks work loose frequently, especially on tapered spline designs. My friend Six-0 turned around and went home from a ride to tighten his fixing bolt. Good thing too, because left loose, the aluminum to steel interface can “round out”, ruining the crankset. Proper torque on the fixing bolt is important. You cannot generate enough torque with a short handled 8mm allen key to properly tighten this bolt. Torques are usually in the 25nm range. Oh, and did you know that you are supposed to re-tighten it after the first few rides.
A loose crank arm is less common on pinchbolt designs like Shimano Hollowtech II, but it can happen. Proper torque (12-14nm) on the 5mm pinch bolts is important. Be careful tightening these. Use a good allen key and be sure to insert it fully into the bolt. It’d be a bad day if you rounded the hex out of a pinch bolt.
I have had two friends with carbon fiber crank-arms where the threaded aluminum insert for the pedal thread worked loose. You could see the pedal spindle wobbling in the socket. That’s a trashed crank arm.
Some cranks, like the Specialized S-Works, are manufactured with a threaded interface between the right arm and the spider. This is really cool for inserting a spider-mounted power meter. But tightening this interface requires a special multi-pin spanner and high torque. It is very difficult to achieve a long-term fix on this design. Plan on visiting your mechanic regularly for a re-tightening.
Cable Slap Against the Frame
This is commonly caused by the front derailleur cable if it has a little bit of slack in the most relaxed position. I had a bike that buzzed whenever the front derailleur cable was relaxed. I used the noise as an indicator of front derailleur position. When I trimmed it to the right, the noise stopped. This is much easier to diagnose on externally cabled bikes. Yet another reason that the guy who invented internal cable routing should be drawn and quartered – just kidding, a little.
Cleats
Squeaks are sometimes from a loose, worn, cracked, or dry cleat. Check that the bolts are tight. Squirt some spray lithium grease on them and see if that helps. Check for cracks in the plastic. Cleats don’t last forever. They are a wear item, like brake pads.
Pedals
Check that the pedals turn freely. Make sure they are tight against the crank. (The left pedal is left-handed – I use the mnemonic “Back off” to remember which way to turn pedal threads.) A lot of noises “feel” like they are coming from a pedal, but it’s rarely actually your pedal. If the pedal turns smoothly by hand, look somewhere else.
Chain Ring Bolts
These are not usually a problem, but they can be very loud when they are. My friend Perry removed, greased, and re-tightened his chain ring bolts, solving a noise problem that was driving the peloton nuts.
I have also seen broken aluminum chain ring bolts. I use only steel chain ring bolts now.
Water Bottle Cage Bolts
Are your bottle cage bolts tight? Are the threaded inserts in the frame firmly attached to the frame? Those inserts are nothing more than threaded pop-rivets. They usually get loose from rotating when you try to remove a rusted-in cage bolt.
Go out to your bike right now, remove the cage bolts (gently), clean them up, grease them well, and re-install them. If they are rusty, go to Ace Hardware and get some stainless steel replacements. Look for M5-0.8 bolts. Don’t use SAE 10-32 bolts. The 10-32 size is just close enough to screw in and tear things up.
Sometimes loose inserts can be tightened back up, or they can be drilled out and replaced. The hardest part is getting the bolt out if the insert is spinning. Cage bolt insert replacement is an advanced shop repair.
Quick Release Skewers
The interface between the frame and the quick-release skewer is prone to creaking. This is a dry metal-to-metal interface with no standardization among manufacturers. Noise originating here is very common, especially with ultra-light skewers like those that come with Zipp wheels. (And the sound is nearly indistinguishable from bottom bracket noise.)
If your bike is making noise in time with your pedal stroke, jump off, release your skewers, tighten the nuts a quarter turn, and re-engage them. Impress your friends with this recommendation. It is such a common noise source that you’ll likely be right.
Take the skewers out and wipe them down. Wipe down the dropouts. Give the cam mechanism a drop of oil and put it all back together.
Try swapping out skewers from another set of wheels. My favorite skewers are Dura-ace, but they are too expensive for me. Cheap Shimano skewers like these look decent and work great.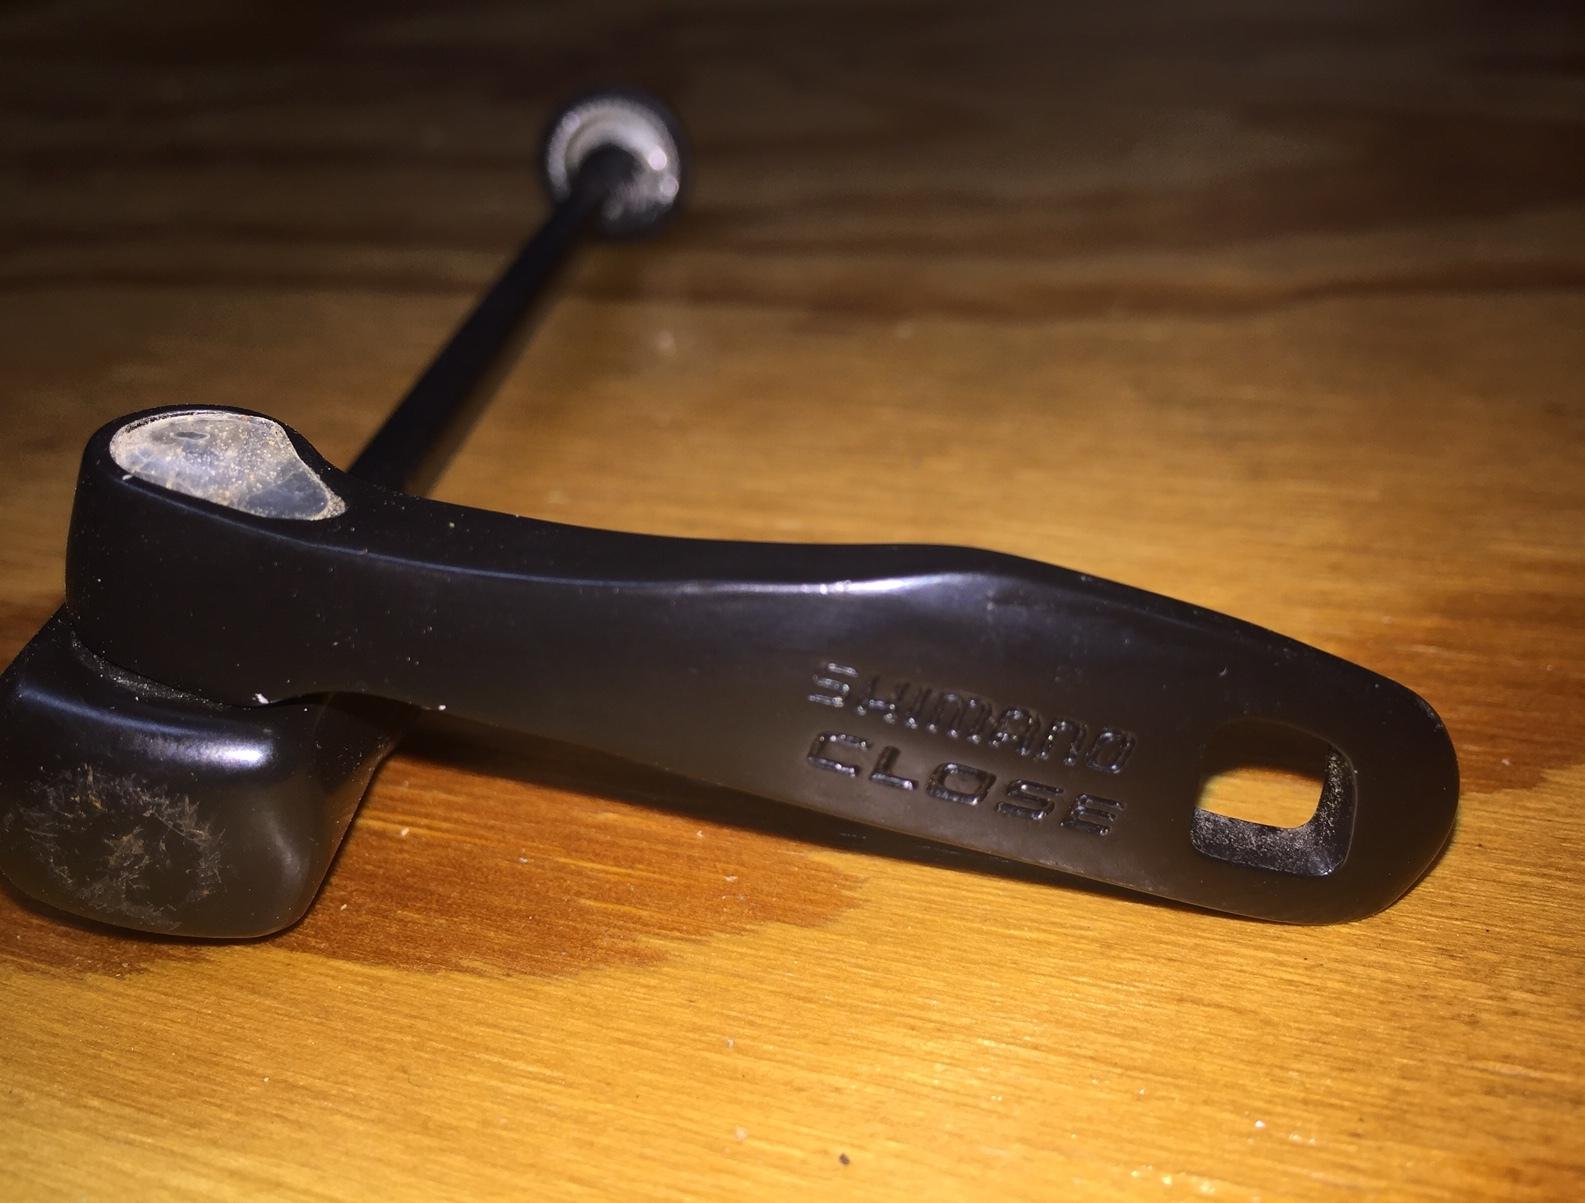
My Mavic Ksyrium skewers started making a rattling noise at the interface between the metal lever stub and the plastic lever extension. The roll pin interface had become very slightly loose. It made so much noise, I thought something had broken loose inside my frame. I figured out what it was at a mid-ride stop, and used a twisty-tie to keep it quiet for the rest of the ride. I will try to figure a way to silence that interface, because I like the action on Mavic skewers.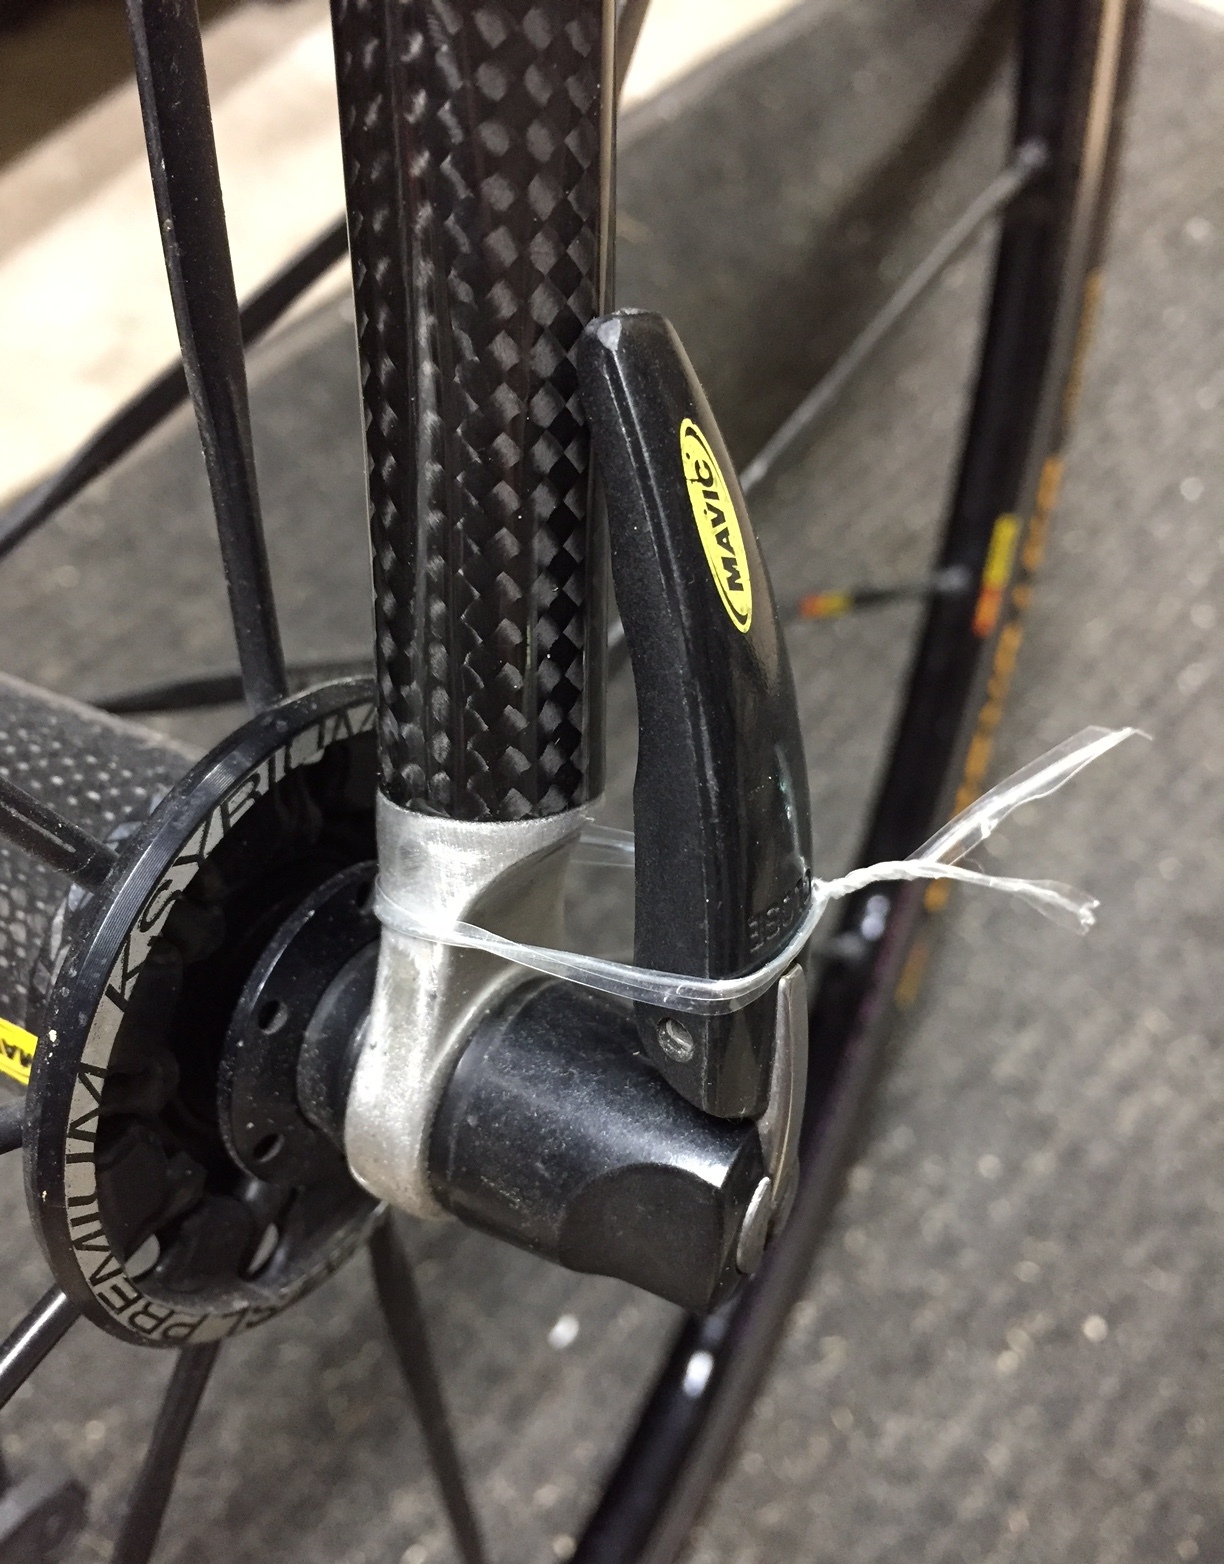
Note about picture above – I normally avoid aligning the lever with the fork (or with the stays on the rear skewer). If the lever is aligned with the fork, it is difficult to get my fingers behind it to release the wheel.
The list of noise-makers goes on, from bottom brackets to zipper pulls, but I’ll stop here and post this. Watch for part two soon. Now go ride your bike!
Killa